Creating Purchase Orders by using WareGo
1. Navigating to the Purchase Order Screen
- Navigate to Main Sidebar Menu > Inbound > Purchase Order.
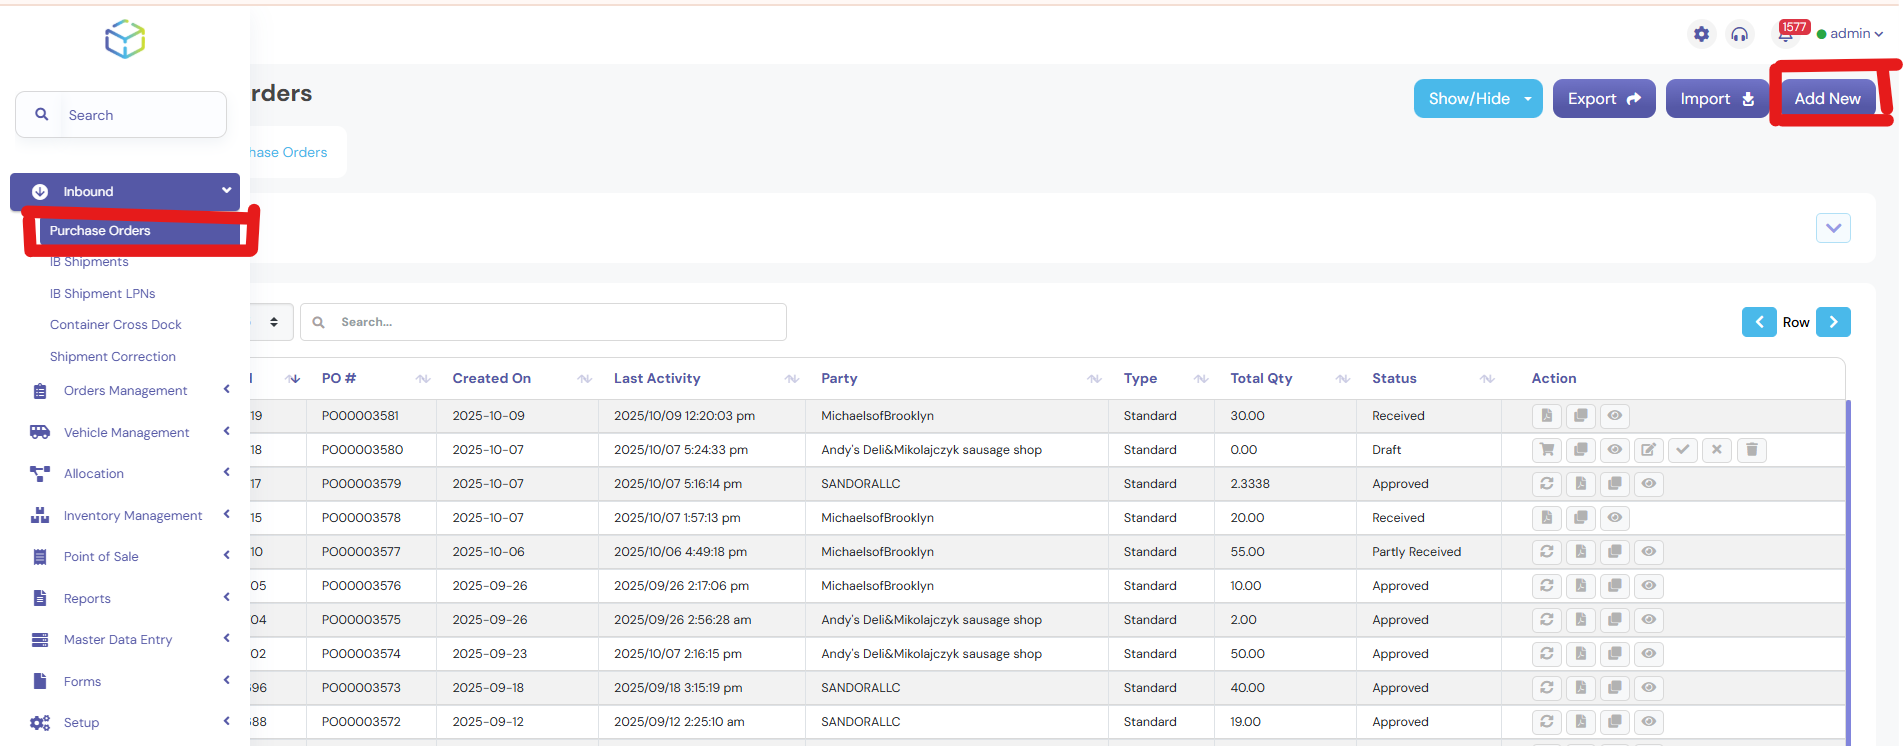
- On the Purchase Order screen, click “Add new” to create a new purchase order.
2. Entering Basic Purchase Order Details
- The system will automatically generate a PO number and select the default company Now Fill in the following fields:
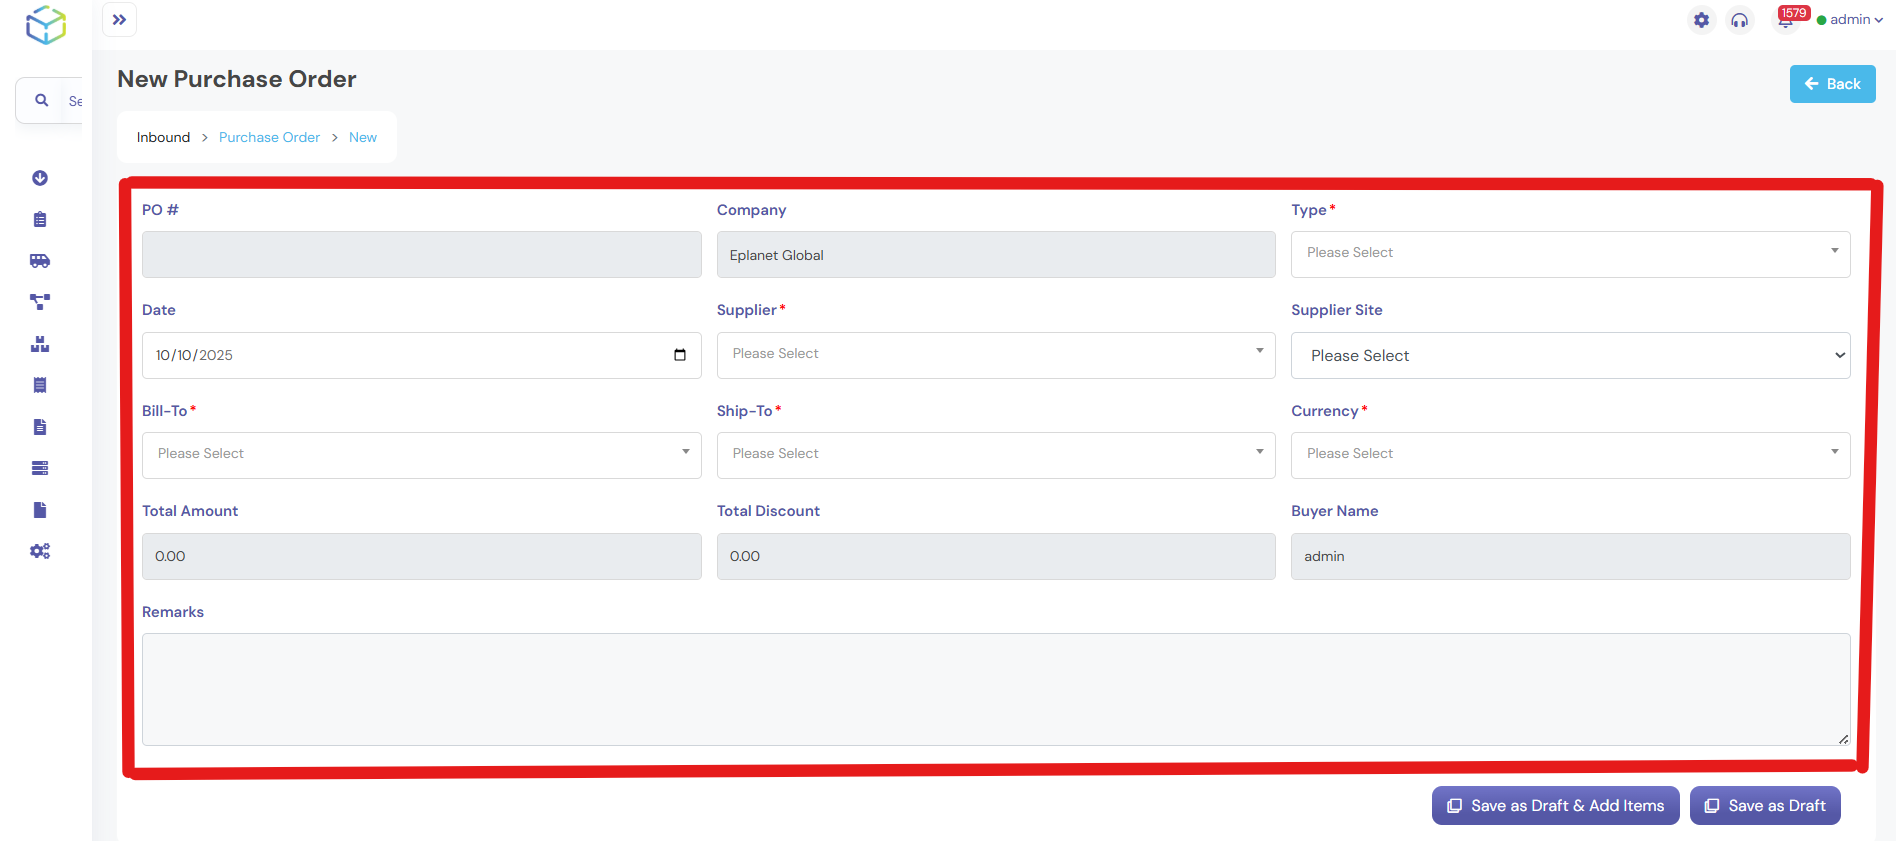
- PO Type: Select from the dropdown menu.
- Date: The current date will be set by default.
- Supplier: Select the supplier from the dropdown menu.
- Supplier Site: Select the supplier site from the dropdown menu.
- Bill To: Choose the billing address from the dropdown menu.
- Ship To: Select the shipping address from the dropdown menu.
- Country: Choose the country from the dropdown menu.
If necessary, enter any Remarks in the provided field.
3. Saving the Draft

- Click on Save as Draft & Add Items to save the purchase order as a draft.
- A notification will confirm that the purchase order has been successfully created as a draft.
4. Adding Items to the Purchase Order
- On the New Purchase Order screen: Item Code/Description: Enter the item code or description.

- The system will automatically populate the Unit of Measure and Category fields.
- Enter the Quantity for each item.
- If you need to make further changes, click Save as Draft to save them
5. Sending the Purchase Order for Approval

- On the New Purchase Order screen:
- Once sent for approval, no further changes can be made to the purchase order.
- The status of the purchase order will be updated to Created.
6. Approving the Purchase Order
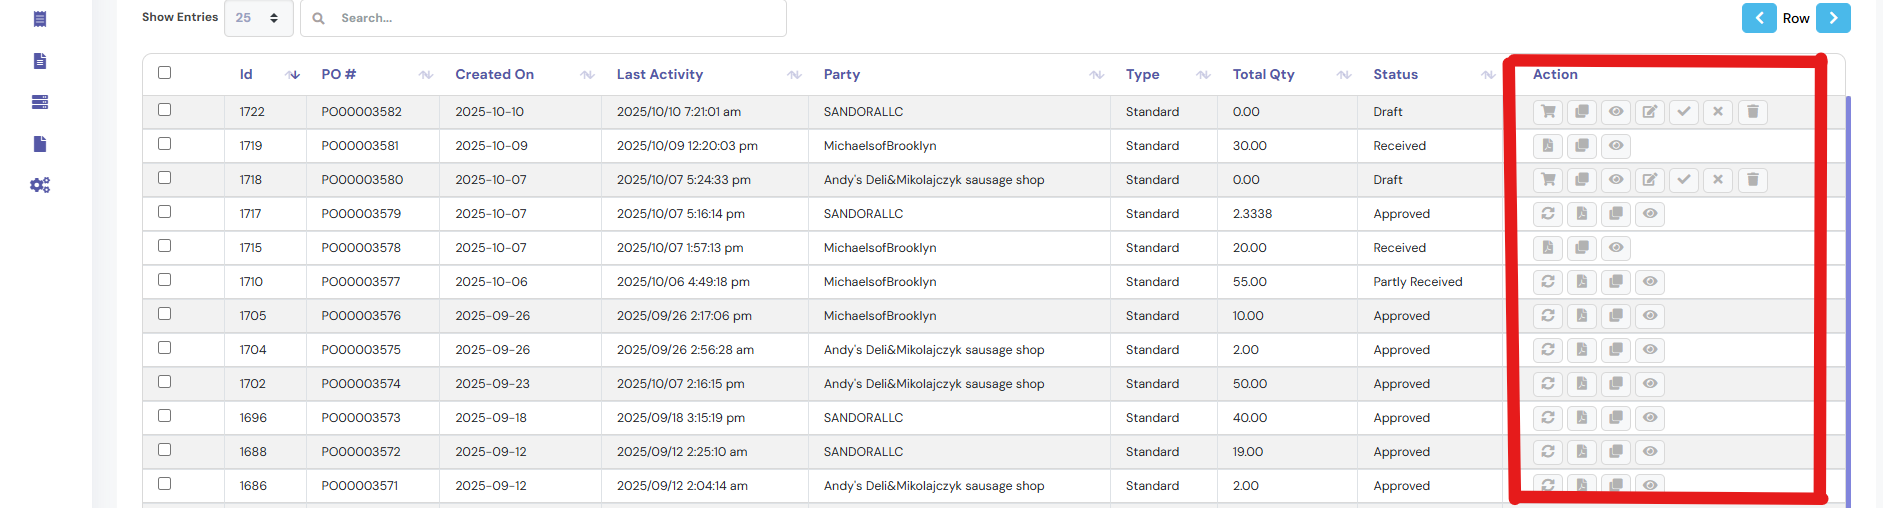
- Navigate to the Actions Page.
- Check the checkbox next to the purchase order you want to approve.
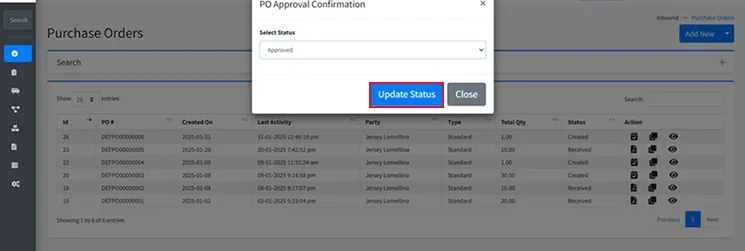
- Click on Select Status and choose Approved.
- Click Update Status.

- A notification will confirm that the purchase order has been successfully approved.