Creating Orders by using WareGo
1. Access the Order Management Module

- Navigate to the Order Management module from the main menu of the WMS system.
- Click on Orders to open the Order Listing Screen.
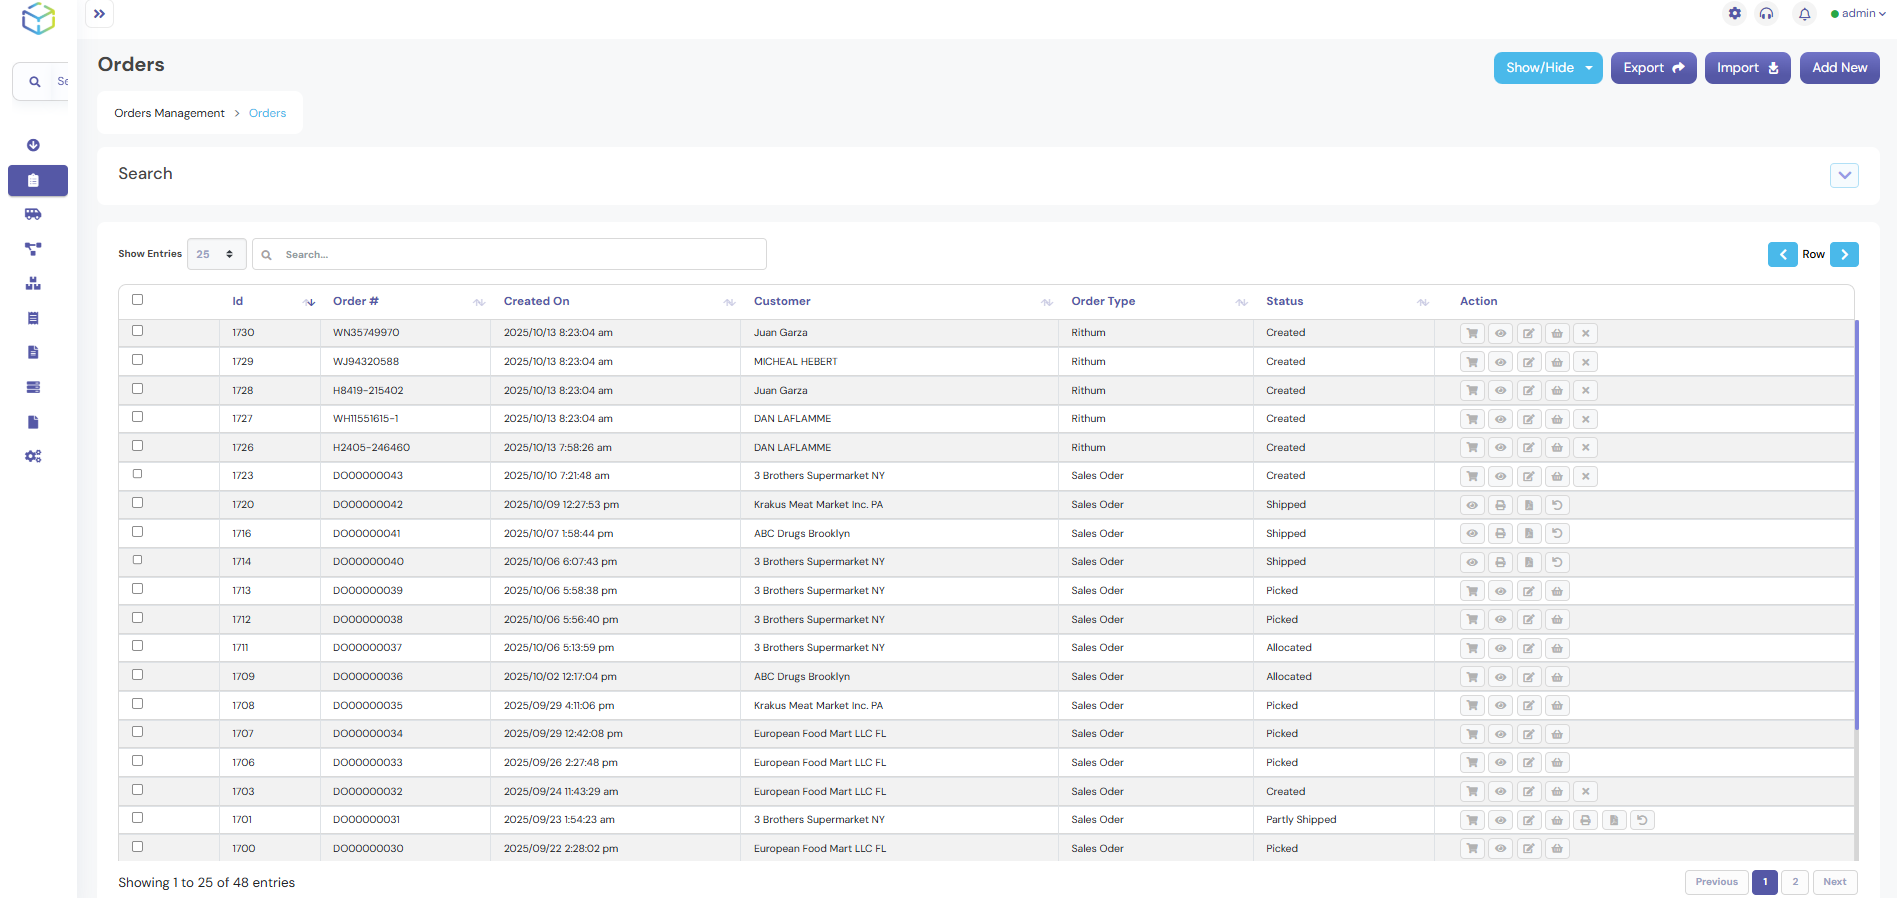
- Here, you can view all orders that have been previously created.
2. Create a New Order
- To create a new order, click on the Add New button.
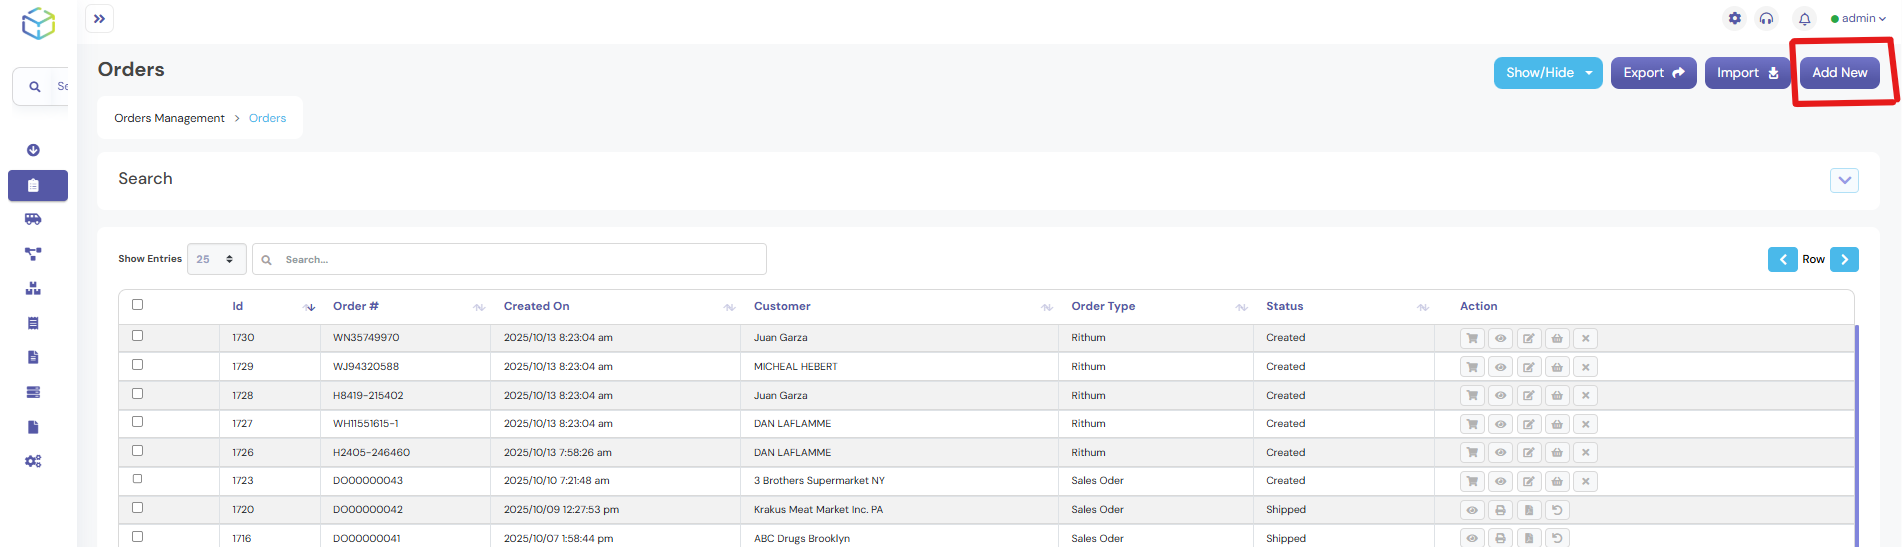
- The system will redirect you to the Order Header Screen.
3. Fill out the Order Header Screen
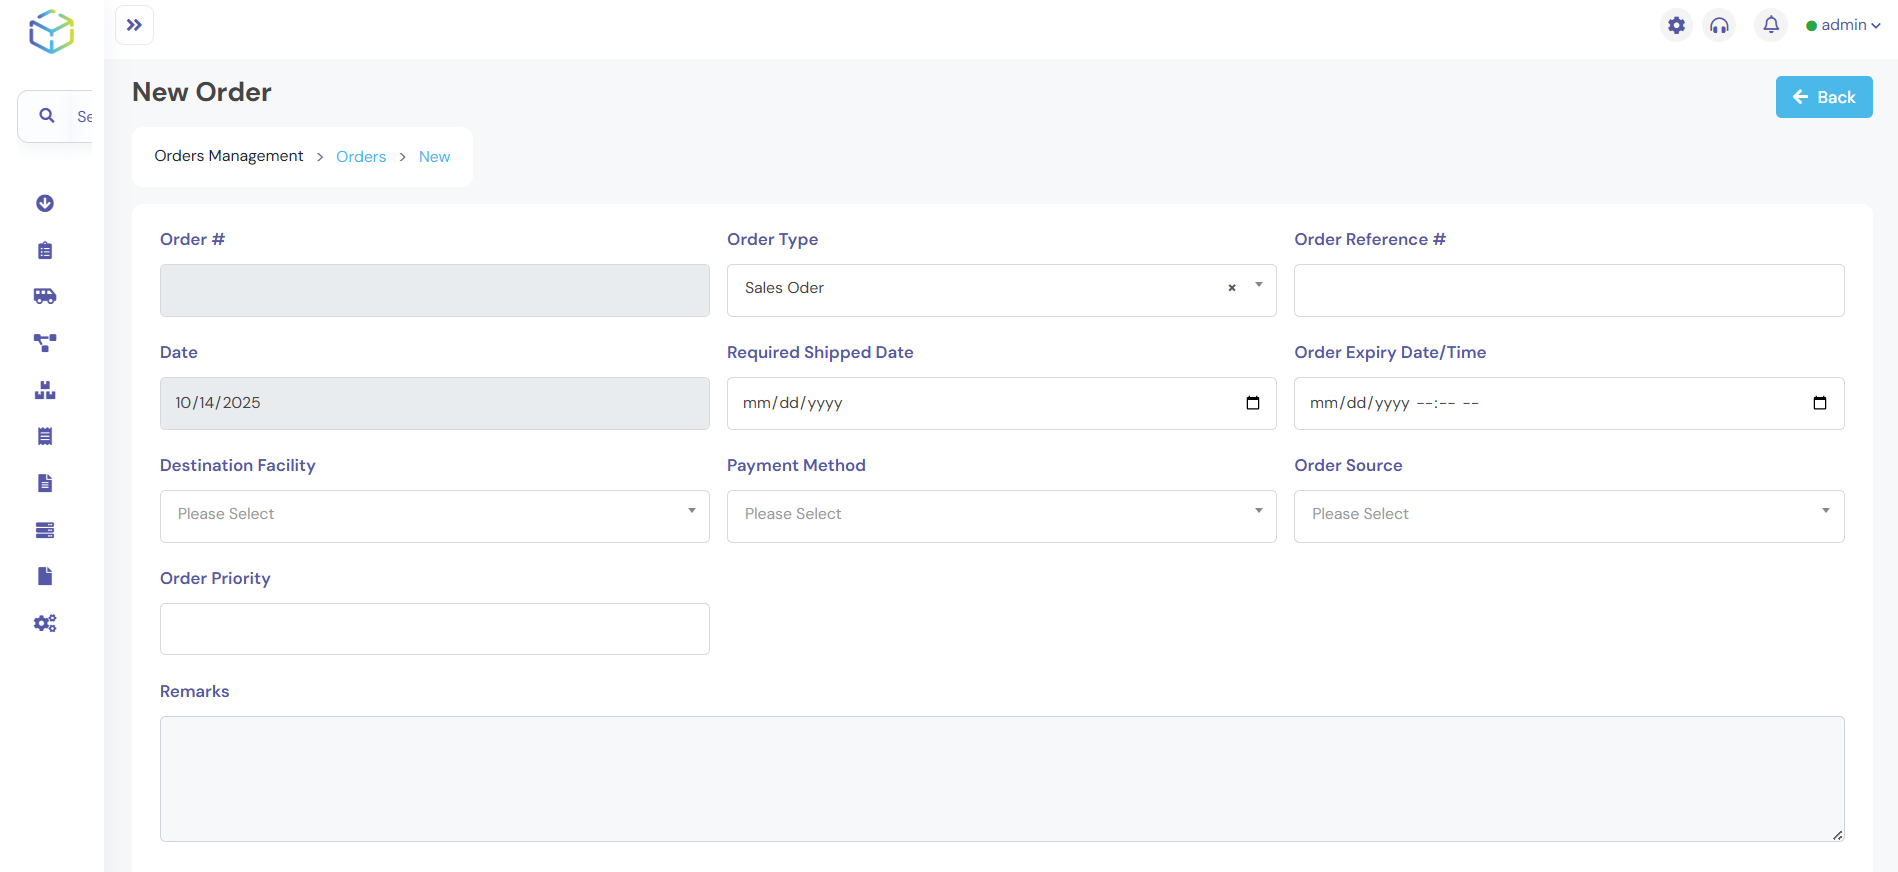
- Order Number: This will be automatically generated by the system.
- Order Type: Select Dispatch Order (this is required to create a new order).
- Date: The current date will be automatically populated.
- Required Ship Date: Enter the delivery date for the order (optional).
- Expiry Date and Time: Enter the appropriate date and time to specify when the order will expire.
- Destination Facility: Select the facility from the dropdown list.
- Payment Information: Enter the necessary payment details.
- Order Source: Select the order source from the dropdown list.
- Remarks: Enter any additional comments or notes (optional).
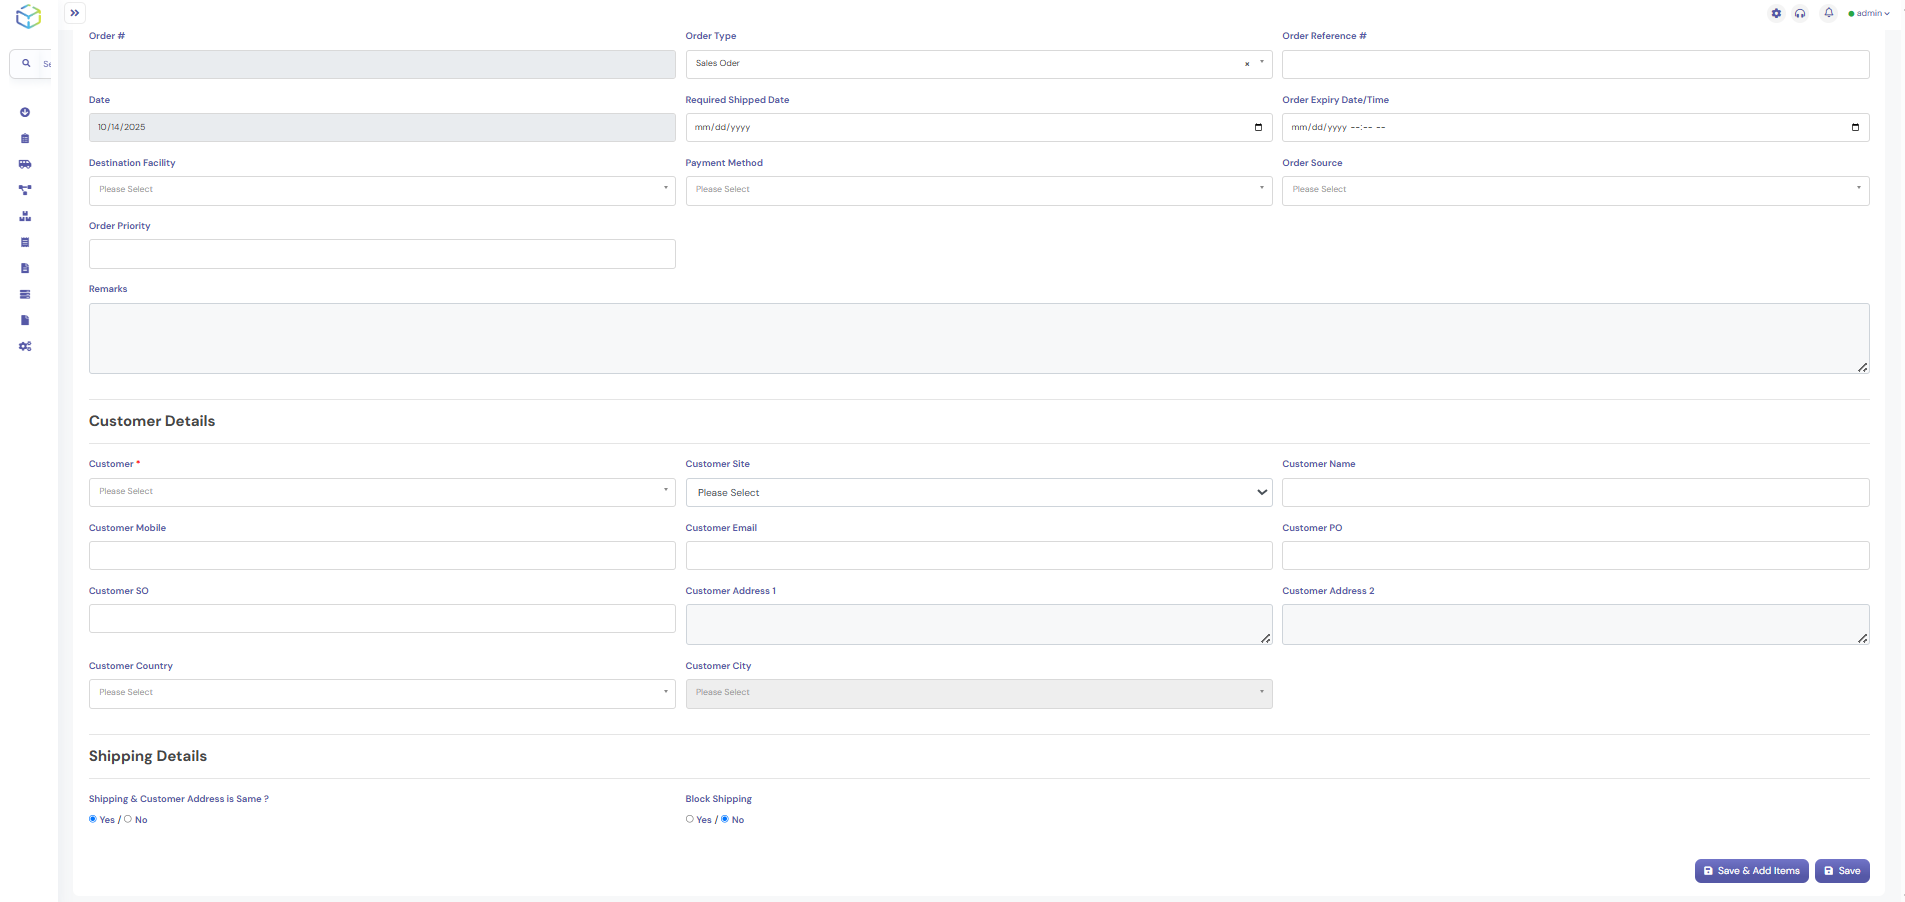
4. Select the Customer
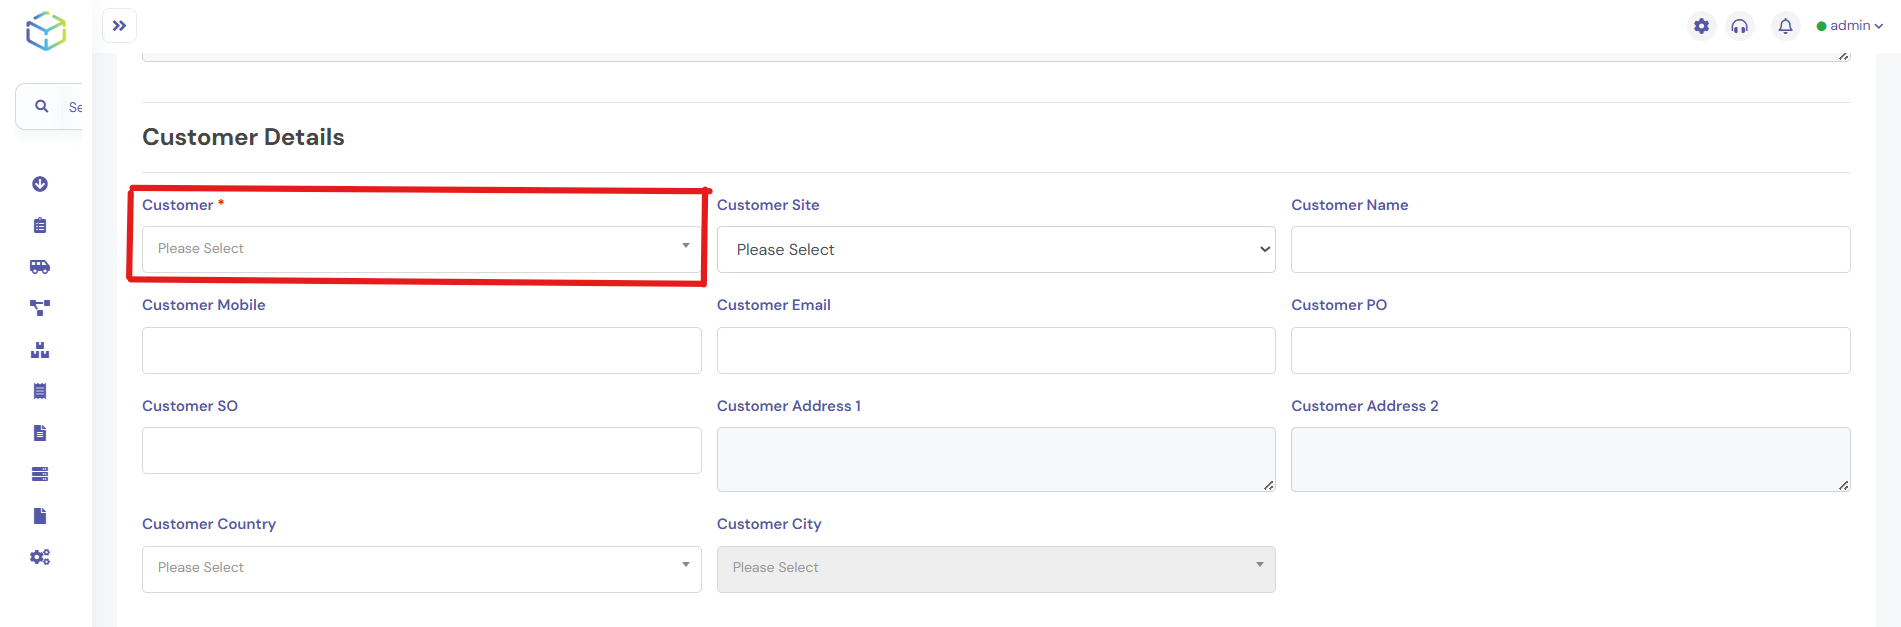
- Click on the Customer Name field and select the customer for the order.
- Once you select the customer, the system will auto-populate the customer’s address and other relevant details.
5. Enter Shipping Details

If the shipping address differs from the customer’s address:
- Scroll to the Shipping Details section.
- Select No when asked, “Is Shipping & Customer Address the same?”
- Enter the new shipping address, country, and any other required shipping details.
If the shipping address is the same as the customer’s address, no additional input is needed.
6. Save the Header and Add Items

- Once the order header is complete, click on Save and Add Items to proceed to the order items screen.
7. Add Items to the Order

On the Order Item Screen:
- Search for items by Name, Item Code, Description, or List of Values.
- The system will automatically populate the Unit of Measurement for each item.
- Review the Available Quantity and enter the required Order Quantity.
After entering the order details for all items, click on Save.
8. Finalize the Order
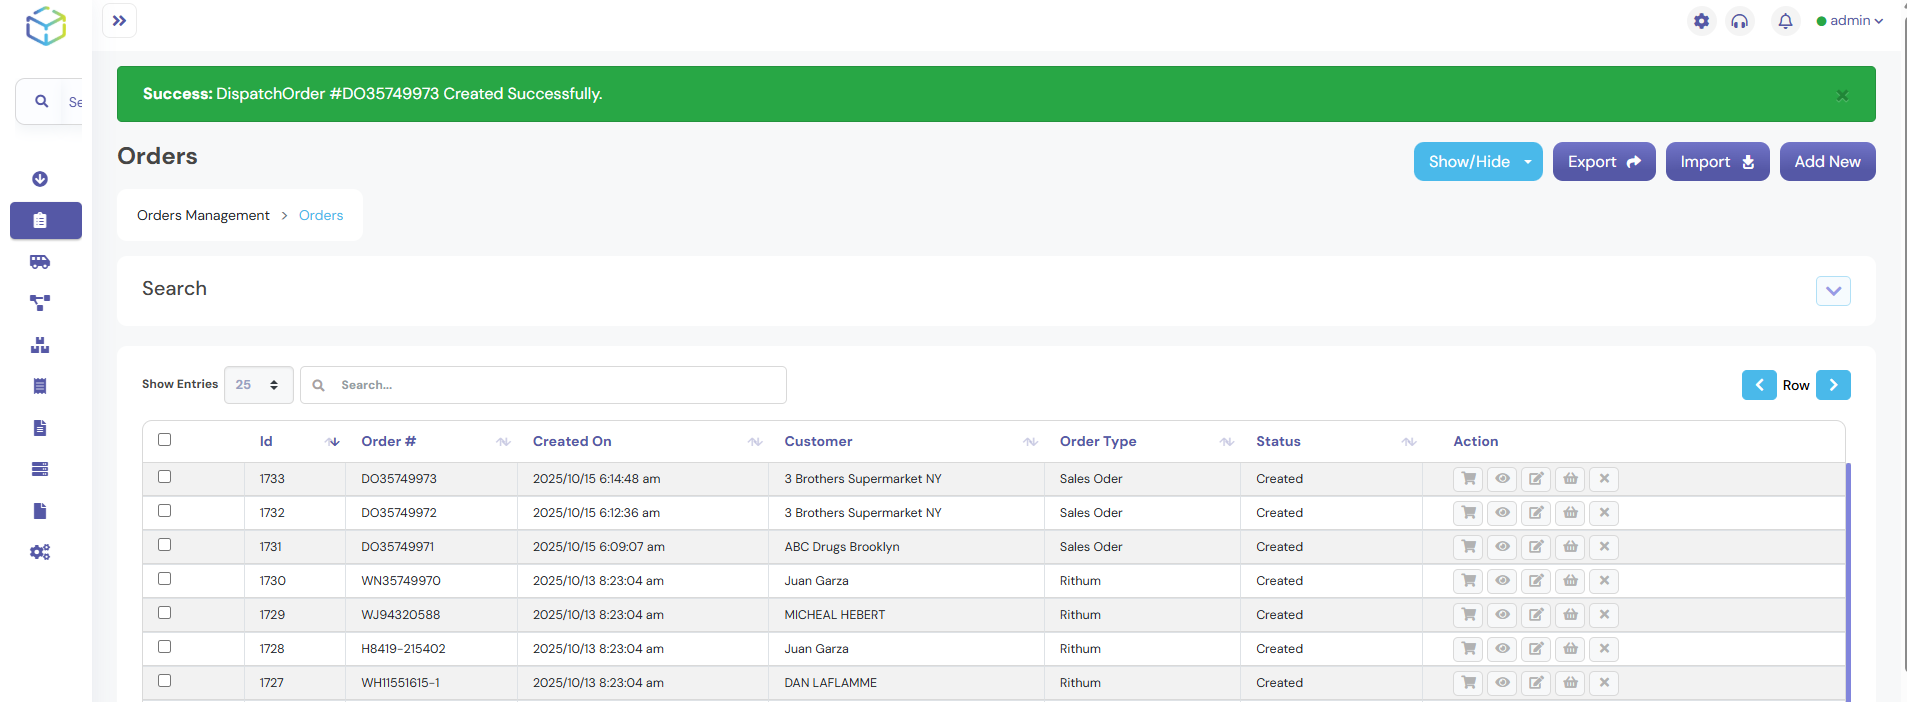
- Once all items are added and saved, click on save to complete the order.
- You will receive a notification confirming the successful creation of the order.
- The order will be listed in the Created Status on the Order Listing Screen.